The Unlikely Gardener

We have had a terribly British weekend. In true British style we planned our weekend around the atrocious weather forecast (then dutifully moaned when the forecasters were wrong and we actually had some sun). Not to be beaten, we carried on with said aforementioned plan and cleaned and tidied the house, worked on the van (more about that separately – that’s a long overdue post), and last but not least, some gardening.

20180528_1122564051525082204902023.jpg

Now, Sam and I are not gardeners. We take very little pleasure out of it, with the only joy being that it all looks pretty at the end of the day. To get on and do it though, we really have to psych ourselves up.

However, not withstanding my long-held aversion to flowers and foliage, I’ve always wanted to grow my own vegetables. I have visions of being like Felicity Kendall in The Good Life, though if the last six weeks are anything to go by, I’ll probably be more like Joanna Lumley in Ab Fab. It turns out vegetable growing is actually quite hard.

Winding back six weeks, I excitedly bought a propigator to go in my potting shed. I knew that I didn’t want to grow any weird and wonderful vegetables, just wholesome vegetables that we use in our daily cooking. So I set about planting seeds to grow tomatoes, onions, peppers, chillies, peas, courgettes and aubergines.

20180402_1230457836186728187105638.jpg

20180402_1234098234433673954395969.jpg

The peas grew really well, as did the courgettes, though the tomatoes were a little slower to take. Two weeks later we were going to Chicago for a fortnight, so I took

20180421_1741054139602129824798148.jpg

the peas and courgettes (then only seedlings) out of the potting shed and planted them into my veg bed so that at least they would get some rain whilst we were away. I also decided to sow lettuce and carrots as it was the right time of year.

I will skip over the sorry tale about the remaining plants in my potting shed; a certain mother in-law neglected to water them often so they had keeled over by the time they saw my watering can again. I thought I could salvage a couple of tomato plants, but it didn’t work out.

Anyway, since we’ve been back from Chicago I’ve been monitoring the veg bed. The peas are starting to wind their way up the stakes, though I couldn’t for the life of me recognise the courgette plants from the weeds. Today I had a really good stab at de-weeding the bed – I hope the three plants that are in a line and have similar leaves are the courgettes! To be fair, the small weeds are not so much the problem, it was the whacking great 2-footers that I was amazed by. How come my vegetables don’t grow two feet but weeds can?! More worried that I had planted some weird lettuce hybrid, I consulted my parents for advice as they grow copious amounts of veg themselves. From a brilliantly blurred WhatsApp picture they confirmed the plant was in fact a weed.

20180523_1942045526078105927496999.jpg

BUT THEY WERE WRONG. Today, whilst raking over my soil and making it ‘aerated’, my little fork got stuck in something at the root of the weeds. It turns out the weeds were potato plants and I had just skewered a medium-sized new potato!

20180528_1308344811417612277473995.jpg

I dug around a bit more and couldn’t find anymore in that area, but then came across a few more stalks at the back with mini potatoes at the roots. I was so happy; potatoes were next on my list! I realised the potatoes couldn’t stay where they were as they would disrupt my lettuce and peas, so I’ve transplanted them into my second veg bed where I pray and hope they prosper and produce many potatoes. Fingers crossed!

I’ve also taken the opportunity this bank holiday to sow a few more lettuces, and get started again in the potting shed with more tomatoes, peppers, chillies and onions. Better luck second time round, eh? I have no more holidays planned, needless to say.

Anyway, if you want to take anything away from this post, here are a few tips (which I can by no means guarantee will work):
1. Wait for the potato plants to grow to c. 2 feet tall, flower and wilt and then your potatoes will be ready to harvest.

2. Use 6-foot canes for your peas; 3 foot ones will be overcome in no time at all and you will damage the roots forcing another cane in, even if it is in the same hole as the shorter ones.

3. Plant your carrots in rows/troughs, not individual holes. Even I can’t mistake a green carrot top for a weed.

4. Tomatoes and chillies like it hot, so get a heated propigator if you can (I don’t, so it takes much longer).

5. Get someone to water your plants if you are away for more than 3 days; and make sure it isn’t your mother in-law.

NB. I didn’t mean to write this post in such a sarcastic tone, but I am British and I am also too lazy to go back and re-write it.

Converting our van – the hard part

The last few weeks have been a bit of whirlwind and things I’ve wanted to blog about I haven’t got round to doing. And then I realised that I haven’t written at all about our van and we have carried out so much work to it!

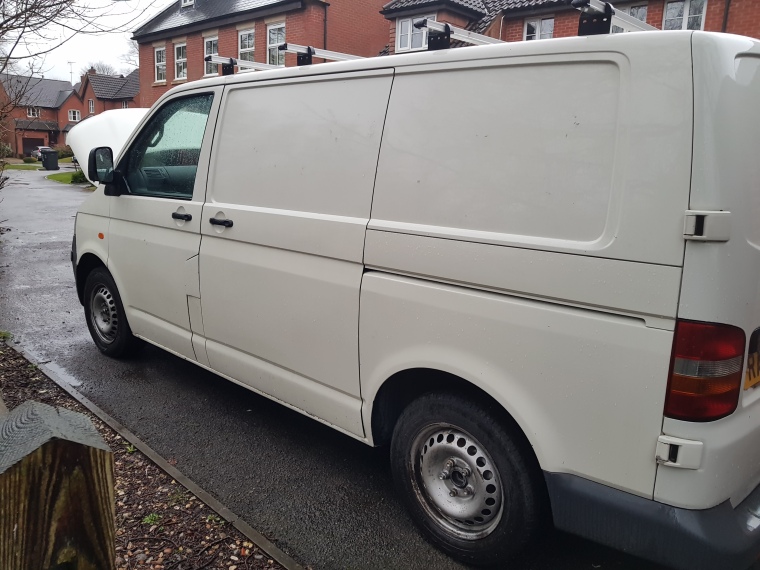
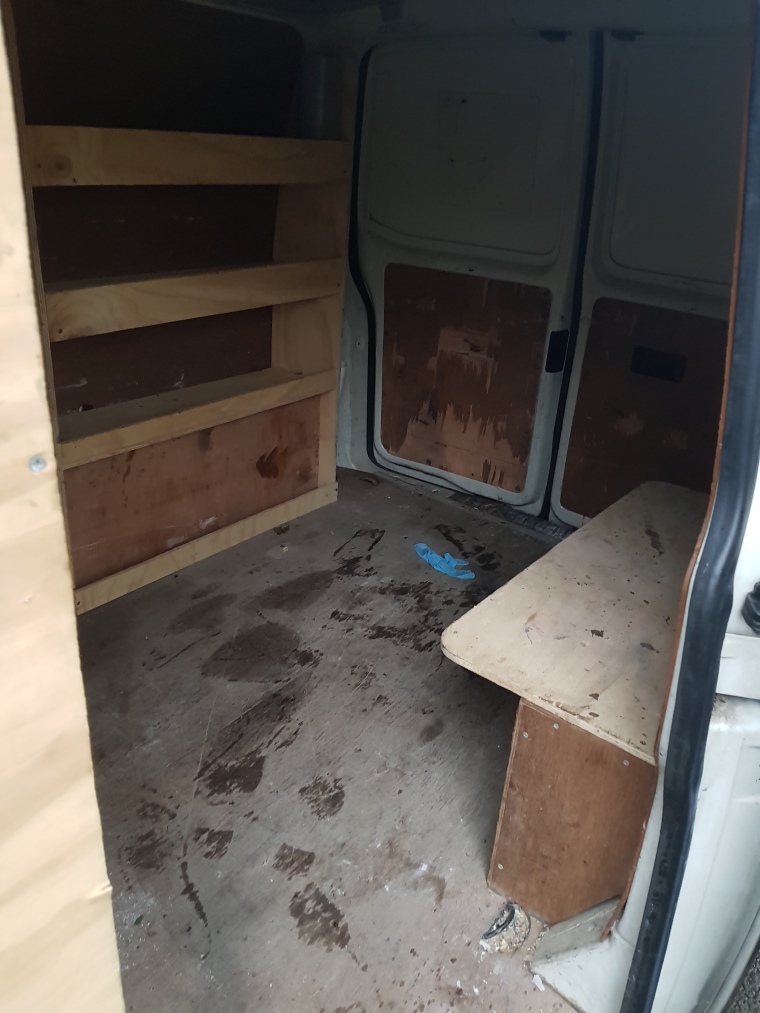
We bought the van in April and in just two short months it has gone from this…

20180330_185622

To this!

20180421_1807376825724076769313135.jpg
Ignore the tape – the adhesive was drying!

From the beginning we have always wanted to do the work ourselves, and desperately wanted to avoid using standard VW conversion flat-packs. The one important thing for us was to optimise the use of space; I’m 5’10” and Sam is 6’3” and we didn’t want to feel over-sized as if we were sitting on/using children’s furniture! Pinterest has been a vital tool in our van conversion box. It is honestly amazing the amount of ideas you can get from that lil social platform, whether its space-saving tricks or different layout designs, it has it all. Plus a load of dreamy pictures of people on the road (us one day!)

I thought it might be helpful for those of you thinking of/in the process of converting a van if I broke down each step we have taken to get the van to the condition it is currently in.

Ripping it out

For those of you who have bought a van with an empty rear – great! For those of us that didn’t, there’s a two-day job in getting the back stripped out. For us, we had to remove the ply sideboards and floor, get rid of old and really worn glues and adhesives and take out the metal bulkhead separating it from the front cab. Once you’ve got down to the exposed metal, its time for the deep-clean. A bit of washing up liquid or car cleaner mixed with water works well on the inside, but be careful of any wires, plus the break-lights at the rear. FYI, even if your van doesn’t look like it needs a wash, it needs a wash.

Windows

Our van was a hard-grafter during its working life and had no windows in the back at all. When you are thinking about how you want to use the space, you really do need to take into account the amount of light. Some people only have windows in the sides at the back (whether that’s the front-section or all the way along the sides), but we have opted for windows in our barn doors too. Sam was a bit unsure about this as its not particularly common, but we are so glad we did it as it makes the space feel larger and like you are part of your surroundings when in the van.

Cutting the windows in is no mean feat, so if you are hopeless with anything technical then get a professional. I am terribly lucky in that Sam is an engineer and most at home with using power tools – one of the drawers in his garage is actually marked aggressive tools which basically means I should not go in there or I will hurt myself! We ordered the glass for the sides and back from CamperGlass, which is slightly tinted and offers some privacy. Because I am hopeless at explaining how he did it and with what, we filmed a video that you might find useful:

Insulation

Some people really go to town with their insulation, stuffing every tiny hole and using boards too. We took a ‘moderate’ approach and stuffed the walls and wheel arches, and then lined it with aluminium insulation roll and tape. We did the roof, and partially covered the floor too. This part can take quite long – its mainly sealing it all off with the tape that’s time consuming but stick with it.
Carpet

Once you’re insulated, its time to carpet! I will say from the beginning that this was a job neither of us looked forward to. The carpet is semi-stretchy and quite forgiving, but we had to watch several YouTube videos to understand how people were able to carpet an entire side of a van in one go. Once you’ve done one side though, it does make the rest easier. I do have a top tip: hold the carpet higher on the ceiling so you have equal amounts draping over the ceiling and the floor. As you start to glue it to the van, the massaging movements to get it into every nook and cranny can cause the carpet to start to fall, even though I was holding it as high as I could into the roof whilst Sam pushed it into the side of the van. You will need to use spray adhesive, and coat both the van and the carpet in it otherwise it will not stick that well.

We carpeted both sides of the van, the sliding door and the barn doors. So many people warned us against carpeting the doors, and especially up to the seal of the doors in case water leaks in, but we worked out a way round that. We have carpeted up to near-ish the seals, leaving a small 1cm gap. We made sure the cut in the carpet was straight and even so that it lines up nicely on the door. We have just bought a black strip seal, thinner than the one on the body of the van, which we will use to line the door. You can’t see the thin seal from the inside and it doesn’t prevent leaks either.

This slideshow requires JavaScript.

We opted for a light cream/grey carpet as we want an airy feeling in the van. The most common (and maybe cheaper?) colour is dark charcoal grey but we didn’t fancy that. The marl white/grey is lovely, and its good quality.

Floor

Once the carpet was in we re-laid the ply floor (ours came with the van and was cut to fit). We then laid the flooring which we got from B&Q. It’s a wood-effect vinyl flooring but sticks down rather than being slotted together. Its so easy and also very durable and won’t move at all. I’m quite impressed with its quality as I am usually a stickler for using proper timber/untreated wood not laminate. So there you go!

Next steps

Now that the inside is as ready as it can be, we can start to build the bed and cabinets. Sam has just bought the wood from B&Q (costing £180) and will hopefully be hammering it all together in the next couple of weeks. We are going to be building the cabinets from cheaper ply, and then the work surfaces and doors will be made from old floor boards we already have to give it a sort of rustic look.

screenshot_20180401-2327516981487043393608355.png

The bed will go down the far side of the van opposite the sliding door. It will be a galley sofa essentially, and the bottom will slide out to form the double bed. We can then store the bedding underneath it during the day.

Best buys

It is so easy to spend a fortune when converting your van, but by doing most of the things ourselves we have saved so much money. Our friend has a van and has bought all the kits for it – he estimated he will have spent £11k plus the cost of purchasing the van by the time its done. Ours is on track to come in at £3k 🙂 Far more palatable!

Think about what is important to you and what you are like to use most, as well as how often you are likely to use the van. Its easy to spend £60 on a tap but ours is self-pumping (one push!) and that was £16. Instead of a £450 fridge we have an electric cool-box – same capacity for only £50 plus we can take it out for the day if we are going for a picnic. Savings can be made if you look into all of the options. I’ll post about these items and more once we have made some progress with the interior build.

Book club: A Time to Kill by John Grisham

I have read several John Grisham novels over the years, which is surprising to most people when I usually try to distance myself from my profession. I came across The Street Lawyer several years ago, fresh out of law school myself and working at a legal aid firm where I literally did come into contact with people from all walks of life. However, unlike the character in The Street Lawyer, I had never wanted the corporate life in the city. The Street Lawyer resonated and stuck with me through the years, and is probably why I do not shy away from other works by Grisham.

The most tantalising aspect of A Time To Kill, as well as some of his other novels, is its setting. America’s deep south; dry heat, rednecks and moonshine to name a few of the things that spring to mind. Now that’s probably a gross generalisation, but I’ve always been drawn to parts of the world where you sweat from 8am, cold beer is never far and there’s little but dry, cracked earth and dust for miles. However, there is a darker side to this part of the world, which drew attention in previous years and on which Grisham has based this novel: the racial tensions following desegregation.

Plot

A Time To Kill is the story of a black man who is on trial for killing his daughter’s rapists – who were white-skinned. It follows the life of the lawyer (also white) who is trying to secure the man’s acquittal at a trial before a predominantly white jury. Grisham builds on the lawyer’s initial scepticism of the racial tensions being an issue, then the dawning on him of the harm that he and his family could come to if he continues to be involved in the case. The lawyer is only human though; he has a family to provide for and a job to do despite the difficulties it poses. Featuring the return of the Klu Klux Klan (albeit a rather mild portrayal), it is a well written, both politically and emotionally, novel that makes the reader question the racial bias at that time and the pursuit of justice in such a case.

Grisham has acknowledged that such a heavy plot scheme needs some light humour in order to break it down, in the form of the lawyer’s former mentor – a now disbarred lawyer with a sharp brain but a penchant for whiskey who spends his days on his front porch. A side-kick, in so much as he is a main character, but without the cliché of being a duo against the world.

Simply written, with detailed character traits and personalities, A Time To Kill does not disappoint and is definitely up there in my list of Grisham’s best works.

up-a_time_to_kill
A still taken from the movie of the same name


Around & about in Illinois

As promised, I thought I’d do a quick post about a few of the things you can do if you’re willing to venture outside of Chicago. Chicago is a beautiful city, but there’s so much you can do out in the countryside! So here’s a few things to do if you have access to a car and a few dollars (for the toll!)

Starved Rock State Park
Located approximately 2 hours south/west of Chicago, Starved Rock is an excellent place to go hiking.The area acquired its name after some native Indians were said to have been driven up the rock and starved to death. Not a pretty tale, but truly a pretty place. The Park has approximately 18 canyons from memory, some of which you view from above and some of which you can clamber up and along and see the waterfall in its mouth. There are also some incredible views from atop Starved Rock itself, as well as its sister outcrop, Lover’s Leap. There’s a circular route around the Park which takes around 2 hours to walk, though the more adventurous have plenty of opportunities to branch off or do longer walks along the river. The second best part? It’s completely free to enter!

20180508_1209581190159076605139168.jpg

20180508_121139251921247505904931.jpg

20180508_130927305327406803476288.jpg

20180508_1309212675649294255933967.jpg

20180508_135022146241257955922833.jpg

20180508_1334402571577594250568479.jpg

Indiana Dunes
As the name would suggest, Indiana Dunes is situated in Indiana, not Illinois. However, given Chicago is only c.30 minutes inside of the Illinois border from the south, Indiana Dunes is extremely accessible. It takes about 1 ½ hours to reach by car, but is a lovely escape away from the hustle and bustle of the city. The Dunes comprises of 3 very large sand dunes, forested areas, marsh land and a long stretch of sandy beach, making it an ideal all-day destination. You can hike up and over the Dunes, the largest of which stands at nearly 200 feet tall. We accidentally did the circular route backwards, but were glad in the end as it meant we didn’t have to climb an incredibly steep hill at the beginning! Bring trainers, but you will end up with more sand then feet in them! But then you can say you have done the 3 Dunes Challenge! Then you can take a wonder through the forest on the way back to a relaxing afternoon at the beach. Be warned though, it’s $14 dollars entry per car (or $7 if you are an Indiana resident).

20180507_1250215815583085590871436.jpg

20180507_1243007370216007412672979.jpg

20180507_1247376924753087254823991.jpg

Lake Geneva
An hour ½ north west of Chicago, Lake Geneva is commonly referred to as Chicago’s playground. The lake itself is very large – it’s a 20 mile trip around its edge – and a beautiful place to come on a sumer’s day. You can enjoy various boat trips and tours as well as renting sail boats. There is a small beach to the south and a handful of shops and restaurants and overall it very much has that holiday feeling. You can walk around the entire lake on the Lake Trail, though this does go through the back garden of many (posh) houses fronting the lake, so don’t wander off the path onto private properties.

20180510_1443325672069088296664380.jpg

20180510_1542512167645629637423140.jpg

Further afield
If you have a bit more time , you could venture further north to Milwaukee, and on to Green Bay. Take a picnic and enjoy the countryside!

Illinois is a lovely state, flat as far as the eye can see with large parts of it put to agricultural use outside of the city. It has a calm, more reserved vibe to it compared with Winsconsin which is a bit more rough and ready in my opinion (I like that though).

Hope this is useful if any of you happen to visit!

My dressing room(!) – project #2

Having recently moved from a 2-bedroom house to a 4-bedroom house, our priority was to ensure that we had as much storage space as possible from the get-go, so that we didn’t waste time and money having to sort things out further down the line.

I was getting quite frustrated with our storage solutions in our previous home; under-bed boxes for gym clothes, jeans and holiday wear, work wear rammed in with other dresses and coats in the wardrobe and a full to bursting chest of drawers with everything else. I felt I wasn’t using half of my things simply because I had to delve in/move boxes around/upend the entire room to get to something. So when we bought our current house I decided it was only fair that if Sam got a double garage that I should have the 4th bedroom as ‘my’ room. And my dressing room was born!

We could have got a pre-fab kit or got a company out to measure up, but we like to do things ourselves and get stuck in. I say ‘we’, Sam did most if not all of the work. I just ordered a chest of drawers and made it look pretty.

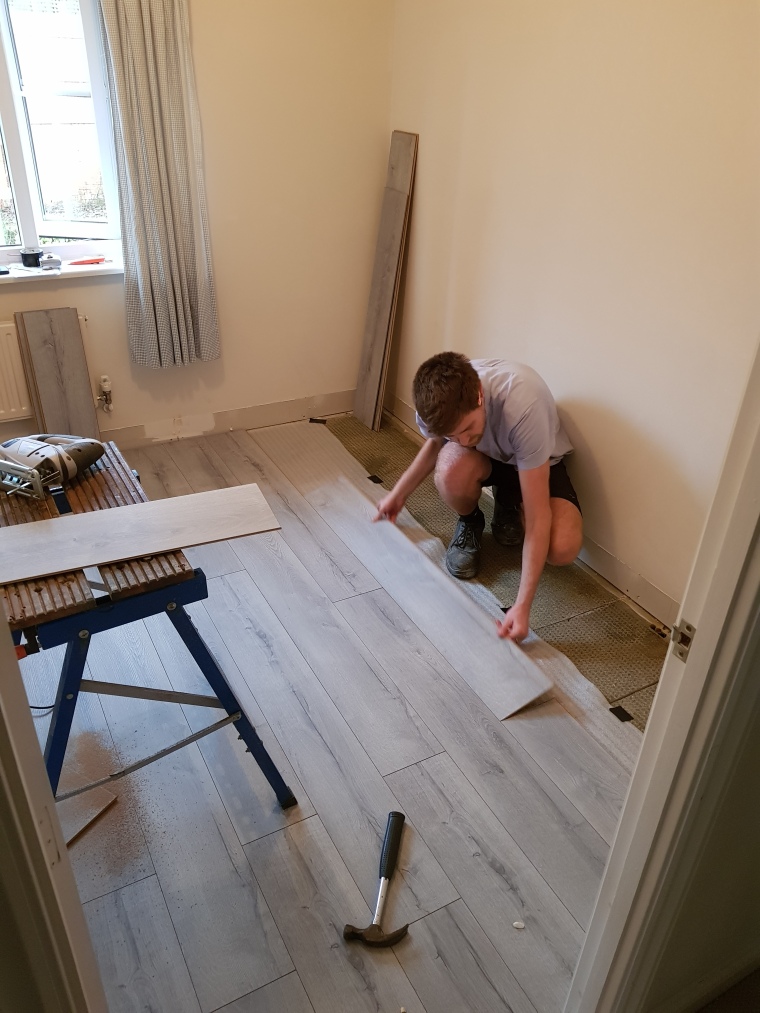
The first step was to rip up the floor (some old pink carpet) and lay down laminate wood flooring. It turned out to be pretty easy as the length of the room was exactly as long as two floor boards. Plus this made it really quick for Sam to cut, so the whole room was laid in 3 hours.

20180311_135455

20180311_154319

After the floor was down work began on the wardrobe itself. We spent over 2 hours in B&Q buying timber and paint (though they do cut the timber to size for you so that saved Sam even more time).

I should say, probably quite obviously, that we had already designed the layout of the wardrobe and Sam had measured each section of it to within an inch of its life so we knew exactly how much we needed of each item.

I thought it best to have a bottom board to give the wardrobe more stability and also so that it would look more like a wardrobe as opposed to seeing the grey floor at the bottom of it. It worked quite well and has made it look more like a unit and a bit more professional.
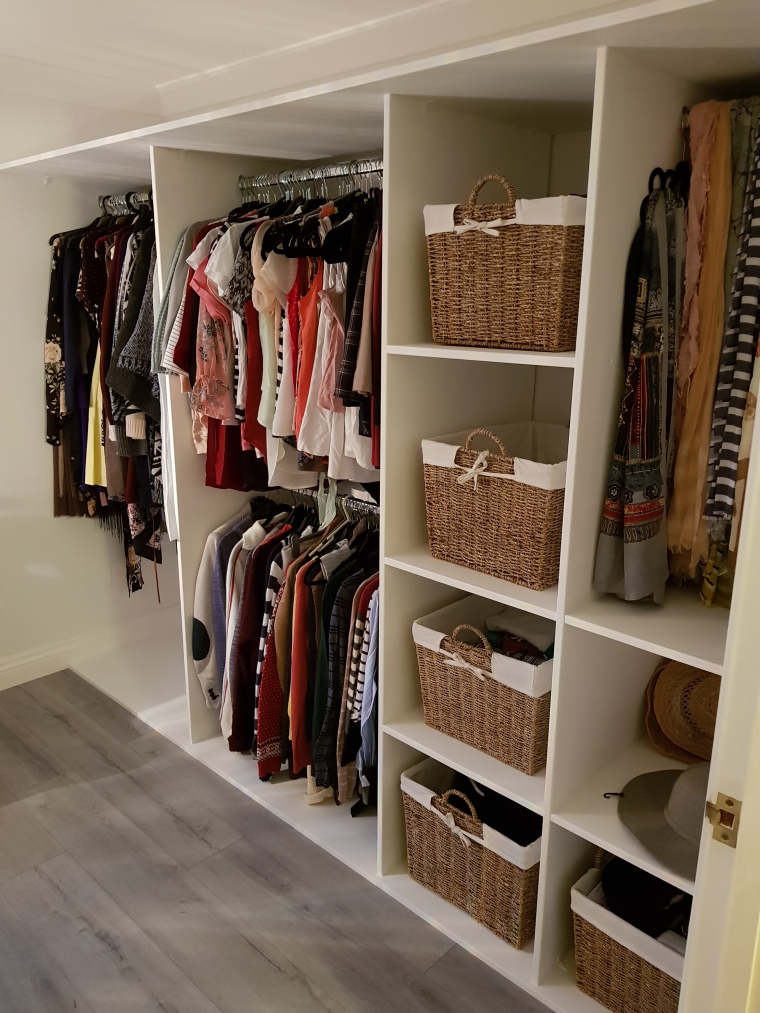
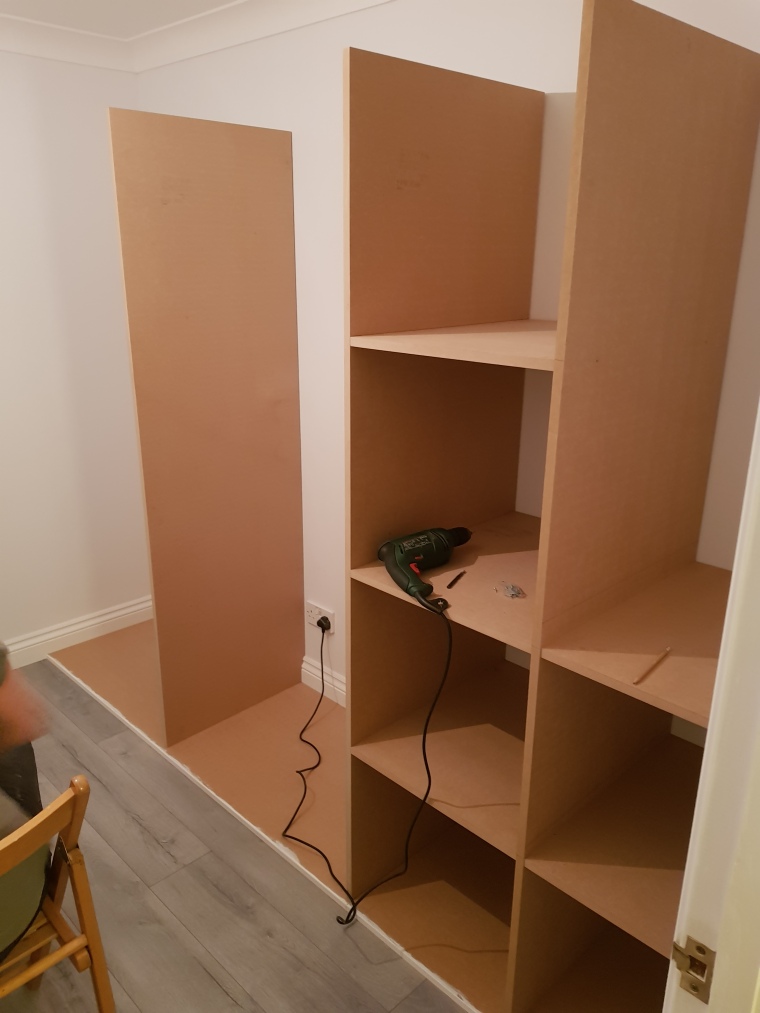
Sam began work straight away once we got home, and within a couple of hours it was already mostly together.

20180318_191930

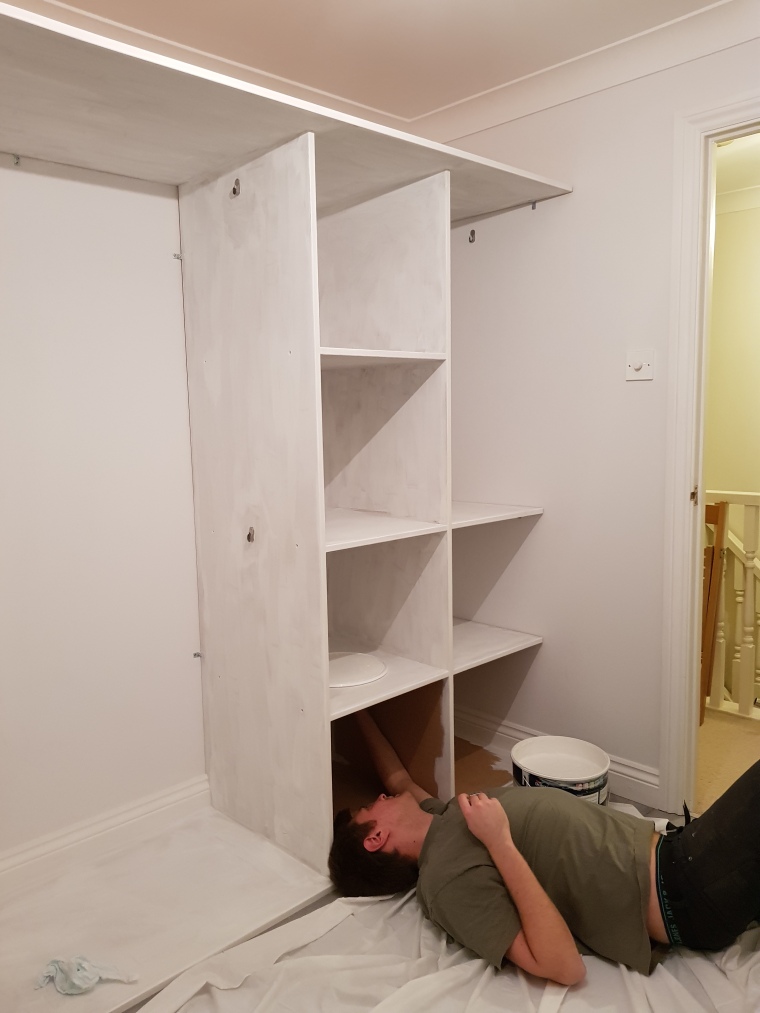
He finished it off the following day by putting the ‘roof’ on it and securing each joint with a corner clip before painting it.

20180319_195533

Though getting into the bottom boxes to paint is not easy when you’re 6’4″!

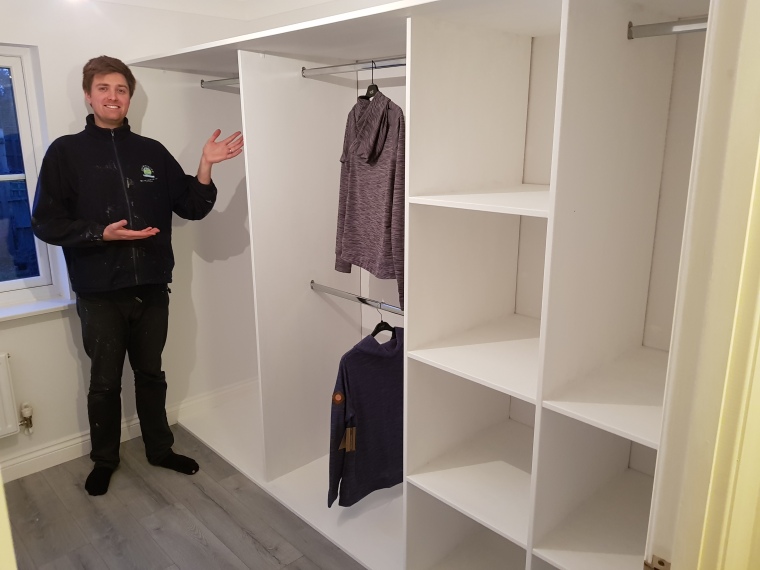
He’s pretty proud of his work though (as am I):

20180320_183227

And here it is in all of its finished glory:

20180324_183625

20180322_214301

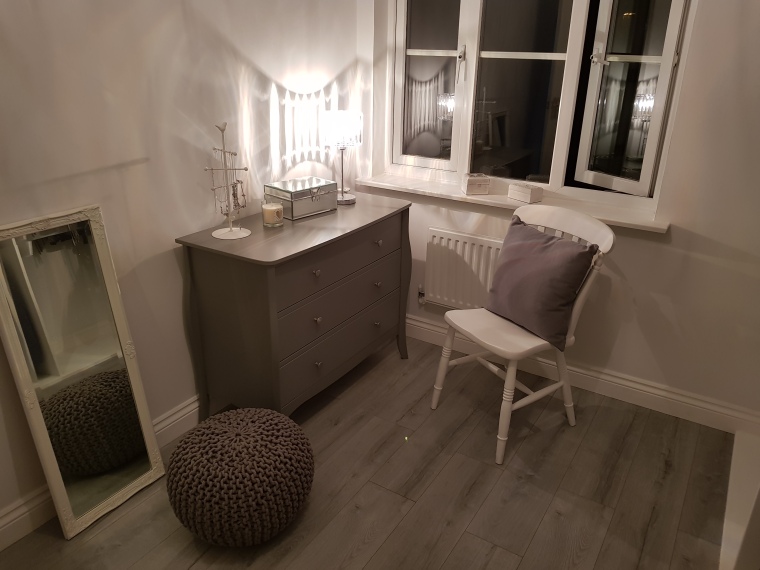
The wardrobe will be covered by a curtain (we’ve just attached the curtain rail), though I need to choose some material for it. I’m thinking mostly white with a grey print of some kind – perhaps a geometric print. I’m not sure though, its something I’ll only be able to decide once I see the fabric in person. The window will have a simple white-ish roman blind on it.
I’m in love with the room! I can’t believe how much the wardrobe holds. And the best part is its all built to our height and the lengths of my clothes. Sam has done a truly wonderful job; not just a pretty face is he! ❤

We’ve joined the #vanlife club!

So I’ve been a bit tied up for a few weeks and haven’t been able to post what I’d wanted to. Work has really got in the way; I don’t usually stress much but there was this one client where I worried so much I didn’t sleep for a fortnight.

Anyway, that’s mostly over now and work is back to ticking along as best it can. Alongside that we’ve been busy round the house (I will totally have to share my new dressing room that Sam built for me – everyone is envious!)

And then this happened 2 days ago:

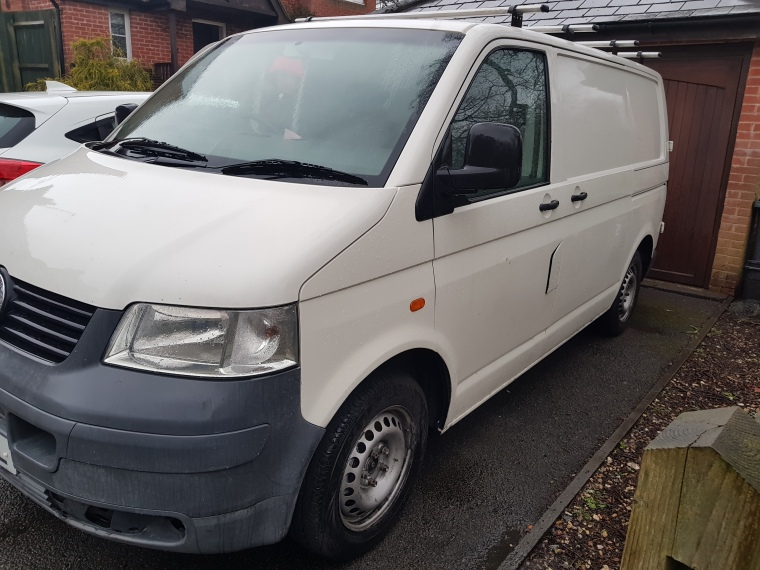
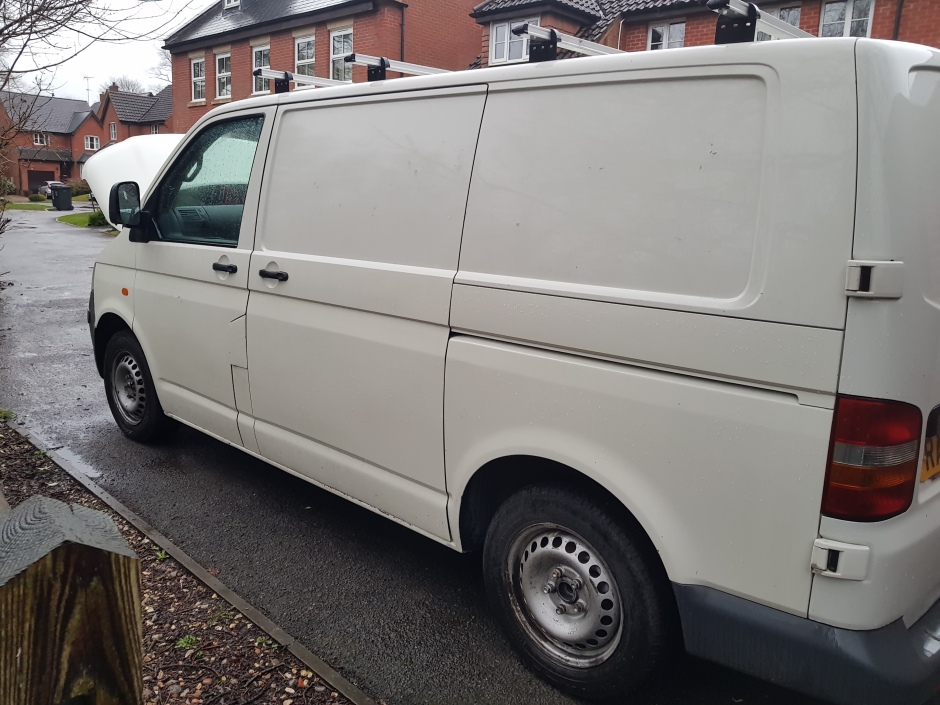
WE ARE NOW THE PROUD OWNERS OF A VW T5 CAMPER VAN!

20180330_185654

We’ve been talking about converting a van to go travelling in for some time now, well over a year. But vans are so expensive never mind customising them so I honestly thought it was a pipe-dream.

Anyway, on Thursday evening Sam received a message from a friend with this van listing so he drove straight there to look at it. I was a bit sceptical simply because there is so much round the house we need the money for, but I trust Sam’s judgement; he’s an engineer and we have a classic mini so any work that needed doing to the van would have to be done by him.

I was on the train home at the time and only had one screen-shot message to look at, and the van admittedly did seem ok. A few minutes later Sam called me, which was when I knew it was serious:

Sam: I’m seeing the van.

Me: Yes, I got your message. What its like?

Sam: Well, good. I want to buy it.

Me: *rolls eyes* bear in mind we still have a lot of work to do round the house and its my 30th birthday in a few months and we need to save for having children (we found out they are waaaaaaay expensive apparently!)

Sam: Its in really good nick and runs fine. There’s a few bits that need sorting, but its good. And for the price we can’t go wrong [that part was damn true].

Me: [explains he will need to sell the mini long-term as we don’t have money for everything]. I’ll leave it up to you. Just bear in mind the work has to be affordable and do-able by you.

Me to mum: I bet he’s going to buy it. I bet we’ll have to traipse up north this evening to go collect it. He’d better sell that mini.

1 hour later. There is a van on our drive.

AND IT IS BRILLIANT! If not slightly more compact than I imagined, but that’s all part of the fun right?20180330_185622

20180330_190038

20180330_190318

So… instead of doing things round the house, my pinterest has exploded with #vanlife pins and ideas and I’ve even drawn out a rough lay out, though that’s probably a tad premature right??

I was supposed to be planting my vegetables this weekend so that’s gone right out of the window.

Anyway, I will probably post a bit on here about how we are getting on converting it, and any recommendation will go a long way, so do let me know!

TTFN!

*so excited!*

Project #1 dresser restoration

Pretty soon after we moved in I knew we needed somewhere to store some of our things; from the board games usually reserved to the under stairs cupboard to our wedding crockery. I searched the internet for a dresser, though finding one with glass doors proved quite hard and pretty much doubled the price. I also didn’t want anything too ‘fancy’ and intricate especially one that could be seen as old fashioned.

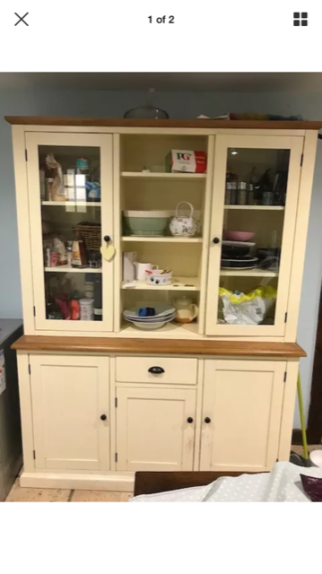
I’m quite new to the wonders of Facebook market place. We bought our dishwasher second hand from there so it was the first place I thought to look for a dresser. In the end though, a few weeks later, we found this one on Ebay for sale just up the road from us.

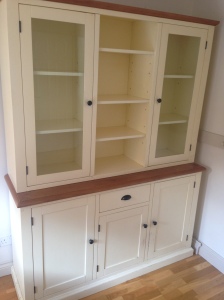
IMG_3058

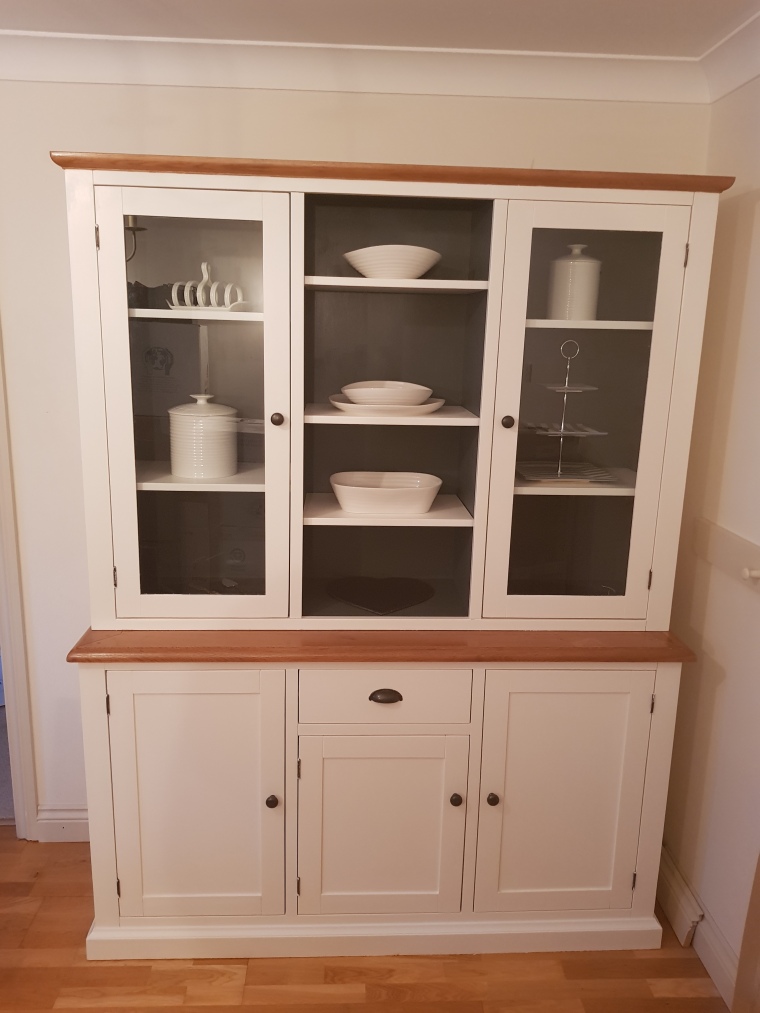
The paint was sprayed on which gave it an odd effect up close, and whilst it looked white it was actually quite yellow. So we set about restoring it.

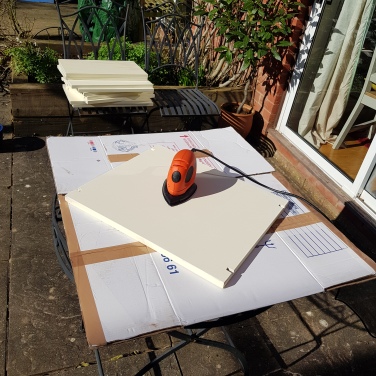
After dismantling it into sections and removing each shelf, the first step was to sand off the existing coat to give the paint something to ‘grab’ onto.

Then it was the most exciting part! Paint time! Though I have to say, I had not appreciated the amount of sides, inside and out, a dresser has. I’m pretty sure I developed RSI in my hand.

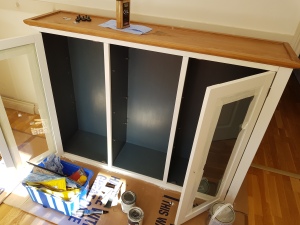
We did the top of the dresser first in Down Pipe Grey; a dark grey paint by Farrow & Ball. It took 3 coats top ensure the right depth of colour but I’m sure on other pieces of furniture 2 coats would be enough.

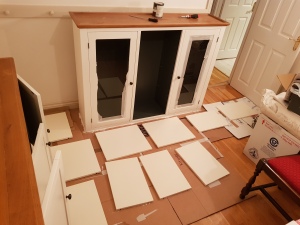
The cream came after; Winterbourne White by Farrow & Ball. This isn’t too white in colour, its an off-white without having yellow hues.

20180225_121301

20180303_134945(0)

20180225_182158

The third and last step was to treat the wood. We sanded the surface to lightly remove the varnish before putting 2 washes of mahogany oil on it to bring out the colour.

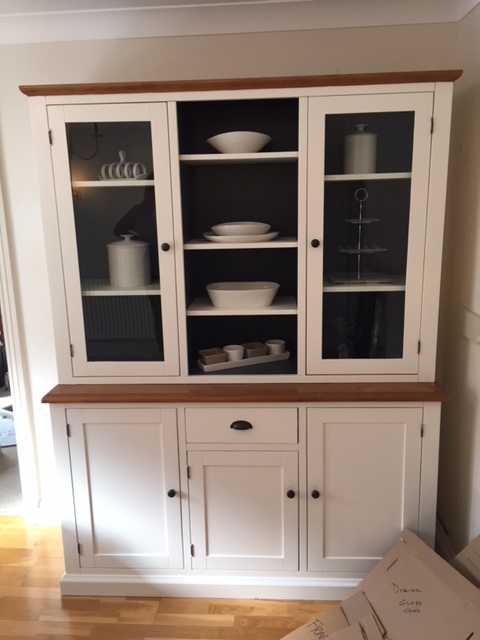
The overall result is fantastic!

20180303_173535

& here is the before and after to show just how much went into the project:

I think the re-paint has given the dresser a new lease of life and suits our modern but comfortable family home.

The dresser is in the dining room, which we haven’t decorated yet. The floor will eventually be replaced with grey flagstone tiles with a light grey on the walls. Any guess what my favourite colour is?!

Sam & I absolutely love doing things to our home, but most of all we love doing things together. At the moment, we are redecorating my dressing room and Sam is in the process of building me a wardrobe from scratch. I’ll post about that as soon as its done – I’m super excited about it!

Mystery Blogger Award!

Thanks so much to A life of Vanity for this nomination! I’ve not been nominated before so this is quite exciting!

Go check out A Life of Vanity when you can – she posts about her #vanlife experience so if, like me, you’ve ever contemplated doing just that you’ll find her blog invaluable.

So this is how this works:

  1. Put the award logo/image on your blog.
  2. List the rules.
  3. Thank whoever nominated you and provide a link to their blog.
  4. Mention the creator of the award and provide a link as well.
  5. Tell your readers 3 things about yourself.
  6. Answer the questions you were asked.
  7. You have to nominate 10-20 people.
  8. Notify your nominees by commenting on their blog.
  9. Ask your nominees any five questions of your choice, with one weird or funny question.

Special shout out to Okoto Enigma for creating this v cool concept.

3 things about me:

  1. I’d give my right arm to have a dog. The bigger and fluffier the better. I’m that friend that points at every dog going and practically cries about how cute it is: ‘look at him, but just look at him, look at how he wags his tail..!’
  2. I go through periods of growing my hair long and cutting it off. It averages 3 years from between jaw-shoulder length and nearing my waist. I’ve definitely got the itch again, though this time when I cut my hair off I will donate it to a cancer charity who make wigs for young cancer patients.
  3. I’m currently trying to achieve a forearm stand before my 30th birthday. I’ve *tried* to take up yoga recently but its not going amazingly well…

Here are my answers to the questions A Life of Vanity asked me:

  1. What’s your all-time favorite movie? Probably Lord of the Rings – it is no exaggeration to say that I have watched each film in the trilogy in excess of 30 times.
  2. If you could have a shitload of money but a job you hate, or a job you love for v little money, what would you pick? I’m a happy medium which probably doesn’t answer the question! I’d rather be happy, as with happiness comes less anxiety which you wouldn’t get in a high-powered job.
  3. Dogs or cats? DOGS.
  4. Who should be our next president? I’m not American, I’m British. But I would suggest.. someone who isn’t Trump?!
  5. Who was your middle school celebrity crush? Johnny Depp, though looking back I’m not sure why. I think it was his pirate days that attracted me…

Nominees:

Fiercely Me

Little Van Ventures

Lovely 365

Absolut Lilac

The Chubby Mind

Georgia Beth Talks

Café Avec Christine

Catherina’s Creative Corner

The Half Arsed Runner

5 questions for you lucky nominees:

  1. Are you a Marmite lover or a Marmite hater?
  2. Would you prefer a heavy night out clubbing or a cosy night in by the fire?
  3. Which: an actual book or a kindle?
  4. Do you prefer to be behind the camera or in front of it?
  5. If you could have one super power for a day, what would it be?

Thanks for the nomination and I look forward to reading all of your responses!!

The 3 W’s

This is my first time taking part in WWW – a meme revived by Taking on a World of Words. So here goes, my 3 WWW’s!

What are you currently reading?

To the Bright Edge of the World by Eowyn Ivey. Its written in a diary form which would usually put me off, but its so captivating! Ivey is quite an artist at describing the turmoil the expeditioners faced traversing Alaska and I’m enjoying every page so far. It’s a bit like a re-imagining of the Scott expedition to the Antarctic, but less like a present-day documentary and more a story of colonization and long distance love. Its beautifully raw.

What did you recently finish reading?

The Kite Runner by Khaled Hosseini. It was a brilliant read, but not as good as A Thousand Splendid Suns in my opinion (though many people think the opposite). I would definitely recommend you read both if you haven’t already as they really had an impact on how I view the current conflict in Afghanistan and other parts of the world; a more humane view point that the news is unable to portray.

What do you think you’ll read next?

I’m not sure. I tend to read whatever takes my fancy at the time, but Elizabeth is Missing by Emma Healey is on my list so I might give that a go. I have no idea what it is about (apart from, maybe, a girl called Elizabeth who goes missing?) so I’ll let you know how I get on with it.

What are you guys reading? Let me know if you have any recommendations!

Kedgeree: mumma’s recipe

When I was younger I used to hate kedgeree. I don’t know why, as I love it as an adult (then again, I also used to eat picked onions whole from the jar and now I can’t stand them!)

As with many things, some recipes are only at their best when cooked by mum. But this week I had a change of heart and decided to make kedgeree for the first time myself – using my mum’s recipe of course.

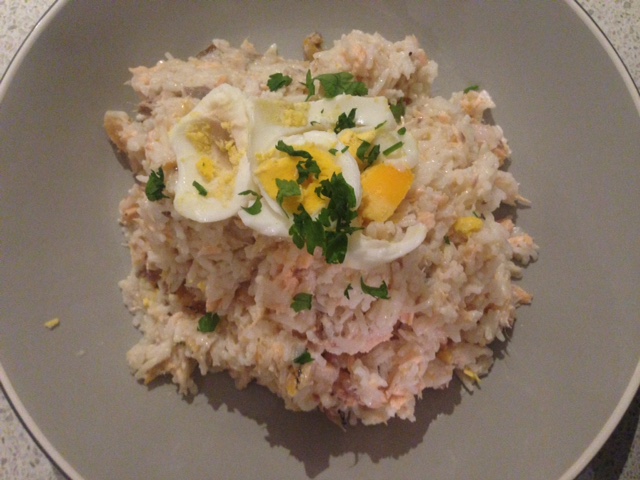
My mum’s recipe is slightly different as she doesn’t use curry powder like so many others do, but she does add cubes of cheese to the mixture at the end. The cheese partially melts and is a lovely addition to the fish, so I would definitely recommend it!IMG_3047

Now, I didn’t happen to have any haddock when I made this recipe and as it was hailing outside I didn’t much feel like running over to the supermarket to get some. So my dish is made with kippers and salmon; this was a lovely change though kippers have quite literally 403 bones in each fillet so I probably wouldn’t use them again.

To make my mumma’s kedgeree, you will need:

1 cup of rice

2 hard boiled eggs

2 portions of haddock or other white fish (the less bones the better)

3 tbsp single cream

2 tbsp Philadelphia cream cheese

½ handful of cheddar cheese (cubed)

Parsley (chopped)

To make:

  1. Boil the eggs for approximately 7 minutes so that they are hard boiled. Drain, and put to one side to cool.
  2. Boil the rice. Whilst the rice is cooking, simmer the fish in a pan of water for around 10-15 minutes until cooked.
  3. Drain the fish, de-skin, and then flake. Do not put the fish back in the pan before flaking as you are unlikely to be able to remove as many of the bones.
  4. Once flaked, add the fish to the rice and simmer on a low heat to keep warm. Pour in the cream and mix. Then add the Philadelphia; sometimes I find it easier to pour a tablespoon of hot water on top of the Philadelphia as it helps it to mix better, but its up to you.
  5. Whilst the mixture is simmering, peel the eggs and chop into slices.
  6. Add the cheddar to the mixture and keep on a low heat for a few minutes.
  7. Remove the pan from the heat, dish up and add the boiled eggs on top with parsley to serve.

Let me know what you think!

IMG_3050

IMG_3049


Creative spurt

Anyone who knows me knows that I often lack imagination and creativity, despite being a dab hand at art and crafts when I get going. Now that we’ve moved into our new home 🙂 I’m so keen to get on and starting making it our own.

Pinterest is a great platform to gain inspiration, and I often find that an idea I initially began with starts to grow and expand into something more pronounced and beautiful than what the confines of my own mind could imagine. For several years now I have had an obsession with pallet wood and all the natural and bohemian-type designs that can flow from working with such a basic, rustic material. Pinterest has truly helped me to develop my little ideas into something that will suit a grown up family home.

My tastes are quite simple: I love wood, plants and grey hues with preference for industrial-type designs that incorporate dark metal over the more ‘twee’ cottage styles. One thing has become quite apparent over the last couple of years, and that is my love of texture, especially when it comes to home furnishings. Thick and chunky and hard-wearing, not fragile and delicate to touch. With this in mind I’ve enrolled the help of my mother to teach me to knit. I’m starting off with medium wool but hope to be able to knit with my arms in the near future; I have visions of a massive chunky bed throw or blankets piled on wooden crates. Wish me luck – my foray into knitting is still in its early stages but its probably fair to say it doesn’t come that naturally to me given the amount of hand-eye co-ordination required!Arm Knitting 5

Having help around the house – not just with my ideas but also on a practical level, is lovely. My parents are very hands on and love to lend a helping hand. Admittedly this is mostly around the garden as neither Sam nor I are particularly green-fingered, but it also extends to painting and helping us lay the flooring in the house too. It is a good bonding exercise but also gets the job done a lot quicker! My mother has always been into interior design so I think I have definitely got the ‘bug’ from her.

DIY has moved on these days. It is not just about wielding a drill and changing a bulb but now includes all aspects of home improvement work. Whilst I could get someone in to lay my wood floor and paint my walls, I enjoy doing it myself. If gives me a sense of pride, and the little knocks and imperfections don’t bother me. I would consider my work to be of a pretty good standard though I am by no means an interior designer or professional painter, etc. Sam is also keen to do as much as possible so we have agreed that he is going to be my builder! Of the non-masonry sense. Sam has basic carpentry skills and has worked with metal since he was a boy, so we are going to make my dining table and benches, as well as a bookcase, over-the-bath unit and toilet roll holders. He’s going to have to get cracking soon as my list is getting quite long…

I plan to share our little creative journey with you and would appreciate any ideas that you guys have too! For now, I will leave you with the following pictures of the type of home we hope to make for ourselves:


My 30th Year Bucket List

In exactly one year I reach the grand old age of 30. Three – zero. Three decades on this planet. When my mother turned 30 she had a mini mental breakdown and was in a bad mood pretty much for the whole year apparently.

I don’t plan on sulking about my age, though I am somewhat surprised that it has come round so fast.

I, like most people I’m sure, have a busy year ahead. But I figured that in my ‘30th year’ and whilst I can still say I’m only 29, that I should set myself a series of mini-goals. And 30 of them seemed the most apt number.

So here goes, here are 30 things I hope to do/achieve before I turn the big 3-0!

  1. Go inter-railing around Europe
  2. Eat multi-coloured macaroons
  3. Make an olive loaf of bread
  4. Do a head/forearm stand
  5. Wear red lipstick
  6. Knit a blanket/throw
  7. Complete all 7 seasons of Game of Thrones
  8. Visit America
  9. Get toned/fit
  10. Go surfing
  11. Lay in a hammock without falling out
  12. Single-handedly design my new kitchen (for a house I don’t yet have, but probably with a little help from pinterest)
  13. Eat at a Michelin star restaurant
  14. Be a nicer person (i.e. less bloody judgmental)
  15. Get a dog
  16. Get a lob (a ‘long bob’ for those not in the know)
  17. Get to and maintain a weight of 10’3
  18. Host Christmas
  19. Enjoy a Sunday brunch out
  20. Have a candle-lit bubble bath
  21. Go bungee-jumping
  22. Get a VW Transporter van #vanlife
  23. Grow vegetables in my new glass greenhouse (wow, this does sound grown up)
  24. Complete the Three Peaks Challenge (though maybe not in 24 hours)
  25. Complete Final Fantasy 15 on PS4 (I am still a teenager at heart)
  26. Finish the cushions I’ve been sewing for c. 3 years
  27. Drink more leaf tea
  28. Have a massage
  29. Be in Thailand, or an equally exotic country, on my 30th birthday itself 🙂
  30. Spend every single day treasuring my Sam

Reading back through my list, there seems to be a good balance between challenging myself to achieve something, and enjoying the simple pleasures in life.

I’m going to make this year a year to remember!

vintage-barn1