The crisp clear mornings, the crunch of leaves underfoot and the coolness in the air – it must be bobble hat and mittens time again!
Autumn is truly my favourite time of year. I think spring and summer walks are really over-rated. I don’t want to trek for miles getting all hot and bothered when I could be kicking back with an iced lolly. For me, autumn and winter are much better times of year to be outside hiking and appreciating the countryside. I absolutely love seeing the change of seasons, and none is more magical then the beginning of autumn. Look at all the lovely gold, orange and copper tones:
We are lucky to live in such a beautiful part of the country. These photos were taken at Badbury Woods on the Oxfordshire border where you can enjoy many walks through the woods and across the fields.
The nights are drawing in quite quickly now. Its twilight by 4pm and dark by 5pm. I must admit – I love the early nights. I don’t feel guilty coming home, getting into my pjs and having a hot cup of tea in front of the telly. Soon, we will have a log burner and I can’t wait!
When we came in today I felt a bit of baking was needed. Now the house smells of doughy sweetness and Earl Grey; perfect, right?
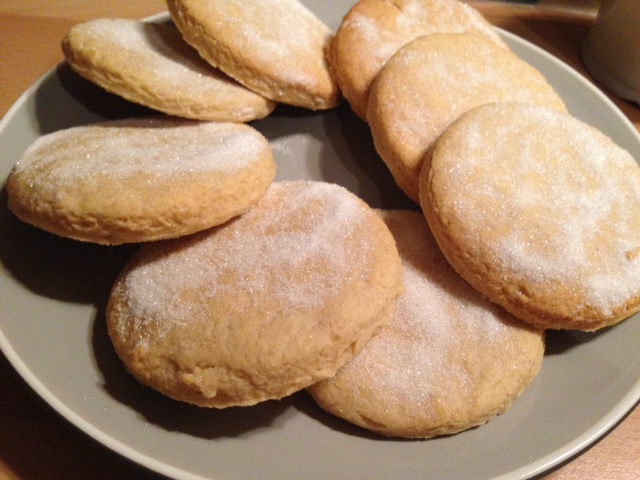
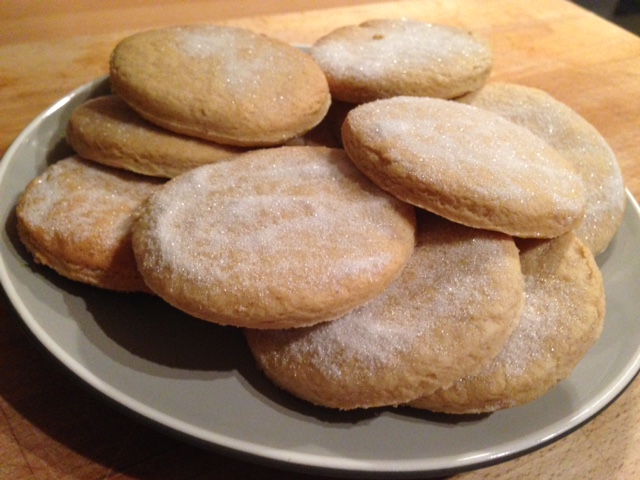
Biscuit time
To make my super simple basic biscuit you’ll only need the following:
500g flour
150g caster sugar
250g butter
2 tsp vanilla extract
1 tbsp milk
To make biscuit-y goodness:
Mix together the flour, butter and sugar. Using your fingers, rub it together until it forms a consistency similar to breadcrumbs.
Add the vanilla extract and milk and mix some more.
Lightly flour a surface and roll on the mixture to about 5mm thickness.
Cut out your shapes and place on a non-stick baking tray.
Bake for between 12-15 minutes at 180 degrees. I prefer to turn it to up 200g for the last couple of minutes as I prefer them slightly more golden, but its up to you.
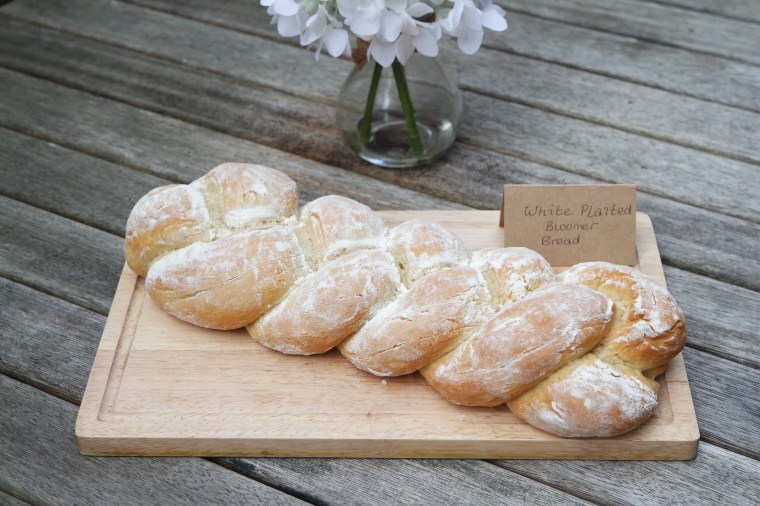
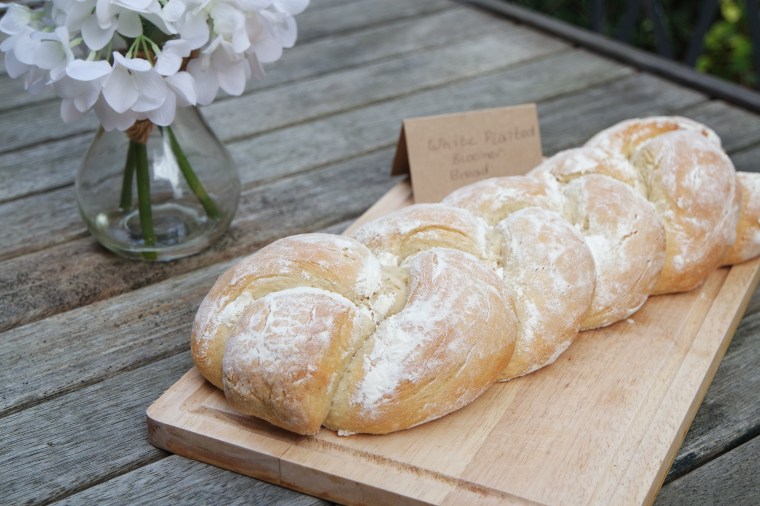
I honestly have the memory of a goldfish. I’d completely forgotten to share my bread recipe with you all and let you know the results of our little village fete a couple of weeks ago!
The fete was far better than we imagined it would be for such a small village. There were over one hundred entries and at least 5/6 in each category. We were quite proud to have taken part! The main contenders were in the popular categories as you’d expect – there were no fewer than 13 Victoria sponges. In the amateur-baker category of ‘artistic cake’, were these stunning bakes:
I loved looking at all the vegetables though – there were leeks as thick as my arms and runner beans nearly 2 feet long. It really inspired me to get growing my own vegetables once we’ve moved house – there is just nothing like fresh home-grown produce really.
Anyway, we didn’t win the cookie nor the bread categories.
Can you spot ours?
I was a bit annoyed as the cookies were lumped in the same category as biscuits, and biscuits placed in all three top spots despite there being several cookie entries. I think the judges were probably traditionalists and not on the cookie band-wagon.
Whilst we are of course slightly biased, the bread was definitely the most eye-catching entry and when we collected it at the end many people came up to us and said we should have won. We won The People’s Choice Award in my opinion given all the amazing comments we had!
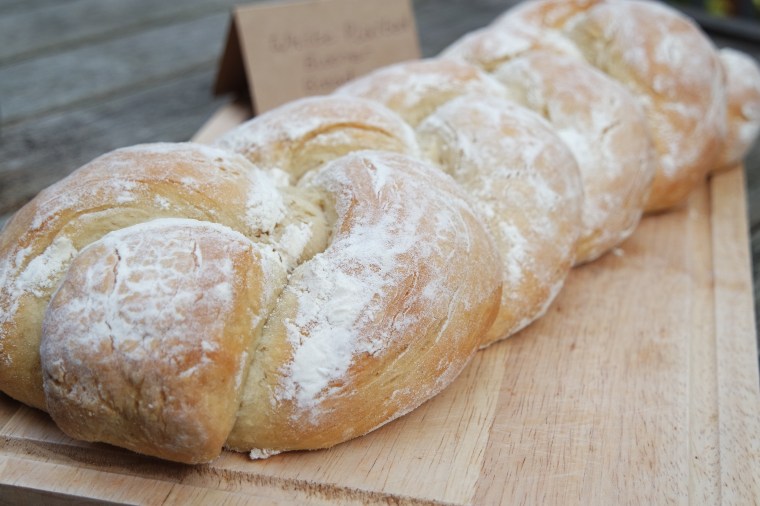
So, if you want to make bread that looks a bit like this, follow our easy recipe below.
You will need:
500g flour
Teaspoon of salt
Instant yeast
30g butter
320ml water
Baking time!
Mix the flour, salt and yeast together in a mixing bowl.
Add the butter and about ¾ of the water and carry on mixing together, adding the remaining water as you go. The dough should be soft and not too wet when its ready.
Now cover your table with a bit of flour and start to knead the bread. I find kneading quite hard – I think you need strong arm muscles to do it properly! I find circular motions are easier and most effective, but whatever works for you. Knead for about 10 minutes until the dough is malleable and smooth.
Now to prove it. Place in a bowl and cover with cling film or a tea towel or anything similar. Leave it on the side for a couple of hours until the dough has nearly doubled in size (some people I know put theirs in the fridge but I don’t think that works as well). Towards the end of the prove, start to preheat your oven to 220 degrees.
Put some flour on your kitchen table and place the dough on top and start to roll. BE CAREFUL – I find the harder/more I roll the less air is in the bread and it becomes more dense. This is less so if you are using proper white bread flour, but not if you are using a standard white flour. Roll into a long-ish rectangle and then divide length-ways into three sections.
Those three sections will form the plait. If you don’t know how to plait, you simply place the outside strands into the middle of the other two strands, working from side to side; line up the three strands and then pull the 1st far-left strand into the middle between strands 2 and 3. Now, pull the now-3rd strand into the middle of strands 1 and 2. And repeat. Try to keep the plait fairly tight so there are not large holes. At the bottom and top simply tuck the strands together and underneath itself.Some people plait bread differently by only plaiting half way and then turning the dough over and finishing the plait. Apparently this gives the bread a bit of stability but I personally do not notice any difference in the bake. I have long hair and plait it all the time – maybe I’m a pro-plaiter!
Depending on the size of your loaf you may need to prove it again for another hour. See below for an alternative to this.
Next, line a tray with some baking parchment – I like to butter the tray first but I think that’s just because I can be quite clumsy! Place your bread on the tray and bake in the oven for about 30 minutes at 220 degrees. I like to dust some flour on top beforehand but its up to you.
Then leave to cool on a rack for 10 minutes and enjoy whilst its still warm!
Whilst the dough needs proving as at step 4, I’ve found that proving the three individual strands of the plait separately works a bit better – however you need to keep them straight on a flat surface and sometimes the strands may swell more in certain places. I will leave it to you to decide!